Sunday, July 29, 2012

DIY Carrot Mask

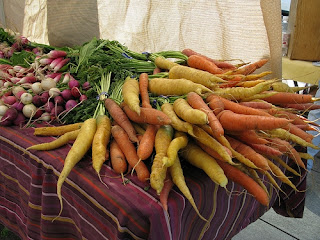
Carrots are delicious and great for you! They are high in beta-carotene (vitamin A), they also contain vitamin C and potassium. When I was younger, my doctor always told me to eat lots of carrots because they were good for my eyes. He actually meant eye health, not eyesight; I was not happy with my doctor when I had to start wearing glasses. I still ate my carrots though.

Consuming carrots or fresh carrot juice is good for your skin. It helps to keep your skin moisturized really deep down, which keeps your outer skin looking fresher and fuller. Using carrots on your face is good for your skin too. Vitamin A is a great antioxidant, which means it destroys those pesky free radicals that cause wrinkles (and crinkles), eczema (some forms), and dermatitis. It also helps to heal sun damage and even skin tone. Carrot juice is also good for blemishes and scars! The list goes on, but I really wanted to share a fun mask with you, not all the benefits of carrots.
Photo by: John Loo

Ingredients:
  • 1 tbsp pureed carrots-you can lightly steam and puree your own or use a jar of baby food (carrots and water only!)
  • 1 tbsp yogurt 
  • Optional ingredients: 1/2 tbsp finely ground oatmeal or kaolin clay
Directions:
  1. Mix all your ingredients together. You can adjust the amounts to achieve a consistency that you like. If you are omitting the oatmeal/clay the mask will be a little runny.
  2. Spread evenly over clean skin. Let sit for 15-20 minutes.
  3. Rinse well with warm water. You can wash again or just rinse really well. Follow with your favorite toner and moisturizer. 
This mask can easily be repeated 1-2 times per week. If you have dry skin, you can also add a drop or two of olive oil and your skin will love you. You can use carrot juice in this recipe, but you would need to increase the amount of clay.

Don't not use if you are allergic to any of the ingredients.

Give it a try and let me know what you think!

Thursday, July 26, 2012

Tub Treats vs. Bath Bombs

The other day someone suggested I start making bath bombs. I replied that I don't make bath bombs, but I do make fizzing tub treats. They replied that I should still try to make bath bombs. It occurred to me that they probably don't know what fizzing tub treats are!

Fizzing tub treats are similar to bath bombs. They are made with similar ingredients that will soften skin while you soak. They both fizz when dropped in your bath water. Both can be scented to give you an aromatic experience in the tub.

Fizzing tub treats are conveniently packaged. You get 6 individual cubes, so you can chose what to add to your bath!
That's great, but what is the difference? Bath bombs are usually held together by spritzing the powders with witch hazel and then letting them dry, some crafters do add butters or oils for added skincare benefits. Fizzing tub treats are held together using butters and oils that harden. Bath bombs are made by packing the moist powders in a mold and then removing. My tub treats are packed in a 6 cavity mold and left there, the keeps all 6 tub treats together until you are ready to use. Bath bombs are often sold individually and generally the entire thing is used at the same time (some can be carefully broken apart for multiple uses). Tub treats are packaged in sets of six small cubes, so you can easily decide how many to use in a bath. Plus, the tub treats are easy to store because they are conveniently packaged in a clamshell container with a lid. Like bath bombs they should be stored in a cool, dry location like a linen closet; the bathroom can be too moist and cause your tub treats or bath bombs to develop fizzing warts.

What do you like to add to your bath?

Wednesday, July 25, 2012

Toddler Play Room

In May, I posted about our new kid-friendly downstairs area. We cleaned, painted, rearranged, and got rid of a lot of stuff (read more here). Hayden loves his large play area and I love that there really isn't much for him to hurt himself on. He doesn't climb on the shelves because he has a blanket box and table to climb on. He can't get into anything he shouldn't except dvd's and I can deal with that. What I didn't like was how big and empty the walls were!

Toddlers need a stimulating environment and there is just something about big white walls that is un-stimulating. We were trying to decide what to do and I found the perfect solution at Joann's when I was perusing the education section (hey, I'm a teacher, I can't help it). For $10, I got a punch-out set for colors and shapes. That's right, $10 and it pretty much covers up both empty walls.

I could probably fit more, but everything had to be high enough to be out of reach. Hayden loved helping me put everything up and he really does enjoying going through the colors and shapes. Currently, everything is yellow, but he'll get it. Of all the shapes, octagon is the one he knows, but I think he just likes saying it :)

I will probably do letters and numbers, but for those, I want him to help paint hangings. So, that is a bit further down the road.

What did you put up for your kids to add an educational element to their room?

Monday, July 23, 2012

Declutter Challenge: Week 28

My poor dog is getting old. She is a border collie mix that is 9 1/2 years old! Her eyes are getting cloudy and her anxiety is getting worse. She has had several accidents on her bed in response to storms, screaming baby, and even because it was time for her to go in her kennel. The poor bed smells terrible. We have washed it, hosed it down, and even tried deodorizer. Nothing has worked. Plus, she never really uses the bed because she prefers to sleep in the hall outside our bedrooms. So, I got rid of the bed! It felt bad throwing it away because it was still in good shape, but the smell was bad, she didn't use it, and the toddler liked jumping on it. So, in the trash it went!

I could have stopped there because that would be my one item for the week, but it gave me another idea! I realized that we have a lot of pillows that we no longer use. We recently bought some new pillows, but didn't throw the old ones out...I know, that was just silly. We have two that are in the camping equipment, so they are always there to go with us. We also have two that we keep for guests that occasionally stay with us. However, we still have a couple of other pillows that hang around the closets and other random places. So, I also walked around and picked up them up and sent them with the dog bed.

I also got an email this morning from Amazon letting me know that another of my books had sold! It took me a while to decide to go ahead and list the books that I have that are more expensive. It took about 2 hours to get them all listed, but it has been worth it. I don't have to do much and the books sell. I can even pay for shipping and print labels online, so I'm not spending a lot of time in line and the post office. I do have to go on and check that they are still active, but it has been pretty easy. So far, I've sold 4 books and that has added up to about $100!

See, three super easy steps and I am getting a lot of things out of my house. The best part is, it hasn't taken me much time. It has been something I can do without taking time away from Hayden or myself.

Friday, July 20, 2012

CFAM 7/21

As a reminder, I will be at The Margarita @ Pine Creek tomorrow for the Colorado Farm and Art Market from 9-1. In case you didn't know, everything at the market is produced or grown by the vendors! That is huge. We are not a resell market, so everything you get is local.

I will have these new items:
  • Detoxifying Mud Masque
  • Tropical Enzyme Masque
  • Fizzing Tub Treats in Ambrosia and Serenity
  • Soap Balls in Celebration 
I have a few soaps that are ready to go, but I'm redoing my packaging for my soaps and my supplies didn't make it in yet.

This week's special:
Get any three 2oz lotions for just $9.50! 
You can mix and match any 3 scents. These are perfect for travel, gifts, or anyone that just can't decide which one to get :)

I can't wait to see you tomorrow!

Thursday, July 19, 2012

Euphoria Spa Soap

I've read about salt soaps and I've been wanting to make them, but I had several concerns. First, salt bars have to be cut really early or they are to hard/brittle to cut. I don't know how my molds would hold up in an oven and a toddler makes it hard to get back in time to cut soap. But, I found an idea for salt soaps using individual molds! Perfect!

As many soapmakers know, extra minerals in soap will reduce the lather of the soap. People with hard water know this too. Most soapmakers add a little extra coconut oil to compensate, but several were concerned that too much coconut would make the soap drying to your skin. I decided to go with 50% coconut oil, but I've read that others go up to 70%. I then did 30% olive oil for moisturizing and 20% palm, but I don't know that I needed the palm to make them hard because I think the salt does that for you.

I couldn't decide what scent to make these. I wanted it to be uplifting and wonderful to go along with a spa or beach experience. I found a small bottle of an essential oil blend called "euphoria" and I thought that would be perfect. I really liked the smell of the blend when I bought it, but never could find the right soap to use it in! I know, that is just silly, but I'm glad I saved it.

I read several blogs about other's salt soaps and I decided to use a 1:1 salt:oils ratio. I also read that you have to be ready to move once you add the salt, so I had my everything ready to go! I mixed to a very thin trace and added my eo blend and mixed some more. I think the essential oil might have contributed to a little bit of acceleration, but I didn't experiment with it before, so I'm not sure (this is why you should always test first...oops). I added my salt and for some unknown reason, I tried to stick blend it in. I quickly figured out that it wasn't a good idea, so I hand-stirred. I started trying to get it in my individual molds and it was really thick. I meant to smoosh it down before I filled up the molds completely, but I realized I had a problem and panicked. So, I just put more soap on top of the soap in the mold. The result looks like two layers smooshed together.
Not so smooth because it didn't pour nicely. The other three cavities are filled with soaps that I was testing FOs on. See, I do test!

As you can see, the soap was thick and hard to work with, but I smoothed it out nicely. I used my blunt-edged cutter to shave the tops off before I removed them from the molds. They came out of the molds perfectly! I'm so glad I used a smooth mold because the bars are so smooth and glossy on those sides.
I do wish they were more even in the middle, but I'm still in love!

So, why did I panic? I didn't take into account how much salt was being added when I made my recipe! So, I had more soap than would fit in my mold. Of course, I didn't have any other molds lined or available. I usually have several extra molds lined for such an occasion! So, that was oops #2. I found some bar molds to use and the soap went in and came out nicely.
Not the molds I would have preferred, but they worked nicely.

Lessons for next time:
  1. Use an FO or EO that I've already tested and does not accelerate trace. The soap does a great job of that.
  2. Resize my recipe to account for the salt.
  3. Get it into the mold quicker and maybe get a helper to smoosh it into the mold evenly.
  4. Euphoria smells even better in soap than I expected. Buy more!
Want to give one of these babies a try? They'll be available August 14th.
Monday, July 16, 2012

Declutter Challenge: Week 27

We've been gathering stuff for another garage sale, so we have a lot of stuff going into the garage. That means that our garage has been a little messy. On Saturday, we decided to clean it up a bit. We pulled a few boxes in from the garage because there is some stuff that we would like to put up online; instead, of putting it in a garage sale. Which means we have a little more clutter in the office now. I just got it cleaned up too! Oh well, we are getting stuff listed and that is just another way to declutter as it sells.

Remember, my declutter challenge is just one item a week to get rid of. It can be small or large, but once you get started, it becomes really easy.

That was not my major declutter though! Saturday, I was putting laundry away and I looked into the shelves in my closet and gasped! It was time to clean out the closet.
GASP! Ok, the clothes on the bottom shelf I do wear, but some are seasonal and some can't hang.

I pulled everything off the shelves on the side and up above. I went through all the clothes and cleared out my sweatshirt collection. I put some of the clothes back because I wear them :)
I did keep a few sweaters, but these can go.
I also found several bags that I cleaned out. One was an old soccer bag that had a tape player (that still works) and a first aid kit. I cleaned out the bag from my triathlon days. I took out the sunscreen, skin glide, and the defogger, but put the wetsuit, goggles, and swim cap back. I also found another bag that was empty that didn't need to be kept, so it went out to the garage.
Soccer bag from my days as a Filly!
Yes, those patches say '86. I've had it a while.

I found my old tape player. It was a very good one too!
Now, my closet looks nicer and I am happier with it. How long did all of this take me? I did this while dinner was in the oven and the toddler was distracted with toys in the kitchen. So, this was less than 30 minutes worth of work.

What have you decluttered!