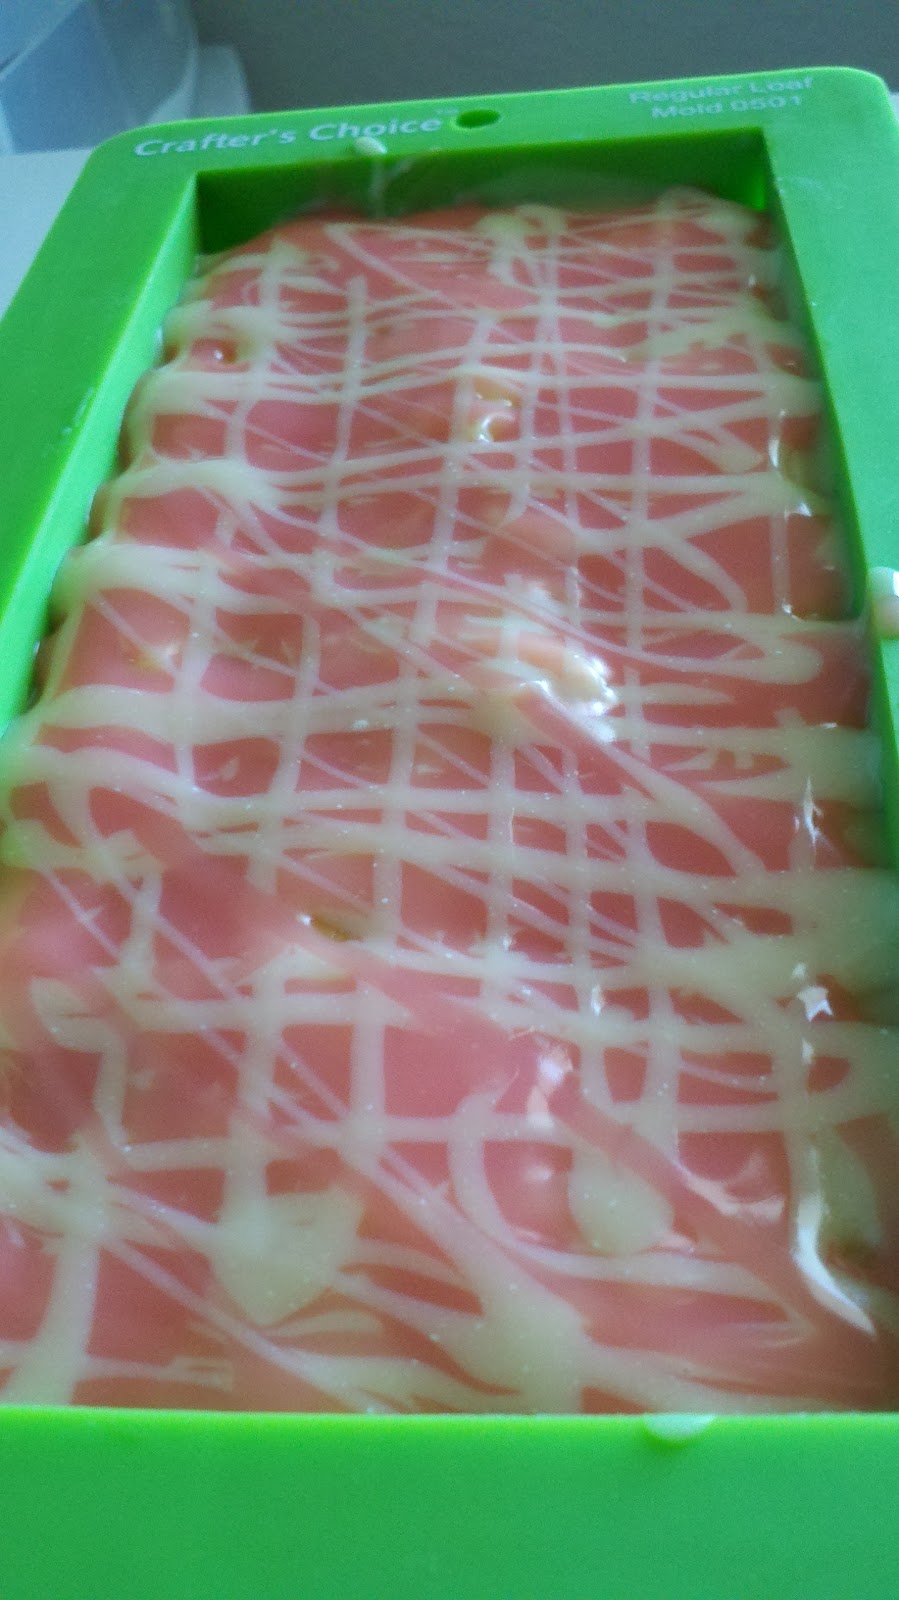
It has been a while since I've gotten to make soap! With all the craziness of moving, unpacking, traveling, school starting, and markets it just hasn't happened. But, today is one of those super-productive days for me! I have gotten quite a bit done at work, almost finished all the laundry, and I made some soap. I've been dying to make coffee soap again, but people didn't really like it without a scent. I finally found a coffee scent that I am just in love with, so my delectable Mocha Soap is back. Made with coffee, coffee ground, and cocoa butter this is the perfect soap for the kitchen or the shower. Did you know that coffee is actually great for absorbing icky smells, so it makes a great hand soap in the kitchen as well as a scrubby body soap in the shower.
These will be ready to go on 10/16! This is a small batch to see if people like it better than the original, so quantities will be limited.
Showing posts with label Soap. Show all posts
Sunday, September 15, 2013
Friday, June 14, 2013
Elemental Swirl Soap
Have you seen this technique? It is really cool! You create two layers of swirled soap! It is an advanced technique, but the results are lovely.
I've had a bit of a stressful time lately. I am getting ready to move. I have a newborn and a toddler and guess what? The toddler is acting out because of the attention that the baby gets. Surprised? I didn't figure you would be. There are a few other things going on, but that is not the point. The point is that I really wanted to make some soap that would really take some skill and concentration. I wanted to get my mind off of my poor, poor, pitiful me crap and be creative and artistic! So, I decided the elemental swirl technique would do the trick!
I decided to use a Monkey Farts fo because I like it! If you want a pick-me-up, sniff some fruit monkey farts. Heck, just say monkey farts. Monkey farts. *giggle* I also chose this fo because I knew it did not accelerate trace or rice or anything else funky. I used a basic oil mix of olive, coconut, and palm because I know how it acts at different temperatures. This is NOT a technique you should use when experimenting with anything new. That recipe = disaster!
Monkey Farts is a fruity blend, so I decided to go with light fruity colors. For the bottom layer I used green oxide (kiwi), yellow oxide (banana), and tangerine wow (mandarin). I used cocoa powder to create a vein separating the two layers. I thought about gold mica, but wanted more contrast. The top is pink oxide (grapefruit), brick red oxide (apple), and creamy uncolored soap (coconut). I also added a fired fuchsia and glitter to the top because I couldn't help myself.
To do this, you need lots of bowls and plenty of work time. Mix your oils, lye water, and fragrance and blend until just mixed (emulsified), not to trace! Pour about half off into another bowl (for top soap) and set aside.
Make the bottom half: Separate your first half of soap batter into thirds and color each. Next, use two of the colors to do an in-the-pot swirl into the third color. Pour into your mold!
Color vein: Put some cocoa in a tea strainer and lightly tap over the soap to get a thin vein of powder.
Make the top half: Take the second half of your soap batter and separate it into thirds. Color two of them. Do another in-the-pot swirl. Use a spatula or spoon and CAREFULLY pour this soap over the bottom layer. You are trying NOT to mess up your vein or first layer. Reserve a very small amount for the top.
Pour the reserve into a baggie and mix in some hot pink goodness. My original idea was to pipe the soap in a really cool top, but it wasn't thick enough. So, I was going to do a basic swirl on the top, but I had too much soap (and you can't waste it!). So, I ended up just pouring it on the top and sprinkling the glitter on it. I can't say I'm disappointed :)
These will be ready to go July 13th!
I've had a bit of a stressful time lately. I am getting ready to move. I have a newborn and a toddler and guess what? The toddler is acting out because of the attention that the baby gets. Surprised? I didn't figure you would be. There are a few other things going on, but that is not the point. The point is that I really wanted to make some soap that would really take some skill and concentration. I wanted to get my mind off of my poor, poor, pitiful me crap and be creative and artistic! So, I decided the elemental swirl technique would do the trick!
I decided to use a Monkey Farts fo because I like it! If you want a pick-me-up, sniff some fruit monkey farts. Heck, just say monkey farts. Monkey farts. *giggle* I also chose this fo because I knew it did not accelerate trace or rice or anything else funky. I used a basic oil mix of olive, coconut, and palm because I know how it acts at different temperatures. This is NOT a technique you should use when experimenting with anything new. That recipe = disaster!
Monkey Farts is a fruity blend, so I decided to go with light fruity colors. For the bottom layer I used green oxide (kiwi), yellow oxide (banana), and tangerine wow (mandarin). I used cocoa powder to create a vein separating the two layers. I thought about gold mica, but wanted more contrast. The top is pink oxide (grapefruit), brick red oxide (apple), and creamy uncolored soap (coconut). I also added a fired fuchsia and glitter to the top because I couldn't help myself.
To do this, you need lots of bowls and plenty of work time. Mix your oils, lye water, and fragrance and blend until just mixed (emulsified), not to trace! Pour about half off into another bowl (for top soap) and set aside.
Make the bottom half: Separate your first half of soap batter into thirds and color each. Next, use two of the colors to do an in-the-pot swirl into the third color. Pour into your mold!
Color vein: Put some cocoa in a tea strainer and lightly tap over the soap to get a thin vein of powder.
Make the top half: Take the second half of your soap batter and separate it into thirds. Color two of them. Do another in-the-pot swirl. Use a spatula or spoon and CAREFULLY pour this soap over the bottom layer. You are trying NOT to mess up your vein or first layer. Reserve a very small amount for the top.
Pour the reserve into a baggie and mix in some hot pink goodness. My original idea was to pipe the soap in a really cool top, but it wasn't thick enough. So, I was going to do a basic swirl on the top, but I had too much soap (and you can't waste it!). So, I ended up just pouring it on the top and sprinkling the glitter on it. I can't say I'm disappointed :)
These will be ready to go July 13th!
Wednesday, June 12, 2013
Vanilla Discoloration
I have had several customers ask how I got such a lovely brown color for my soap. I've also had some that want to know why I would make brown soap. And there are a few that would like a vanilla scented something that looks creamy white like vanilla ice cream.
Where did the brown come from? From vanilla! Why did I color it brown? Because it has vanilla in it! Vanilla contains vanillin which will slowly cause anything that contains vanilla to discolor. The amount of discoloration depends on the amount of vanillin used. Discoloration can range from a light tan to a very dark brown.
Vanilla color stabilizers can slow the discoloration, but they won't stop it forever. You also have to make sure you get a stabilizer for the soap you are making. M&P stabilizers don't work well in CP (I tried anyway, they were right though, it doesn't work well).
For the most part, I don't fight the discoloration. Instead, I use it to design my soap. For example, in my lavender vanilla soap, I used titanium dioxide and the natural discoloration to make an ombre soap. I love the way it looks too! See how I did it here.
I used BB Vanilla Select and a vanilla bourbon fo and lavender eo. It actually starts to discolor right away! Here in the final soap right after it is cut and through day 5. It won't really get much darker than that.
I love the final look and you can see what a huge difference the vanilla makes, but it really creates lovely layers!
You can also separate your soap and use vanilla in one part of it to make a different look. Really, why fight the vanilla? Just use it to make a beautiful soap :)
What do you do about discoloring vanilla?
Where did the brown come from? From vanilla! Why did I color it brown? Because it has vanilla in it! Vanilla contains vanillin which will slowly cause anything that contains vanilla to discolor. The amount of discoloration depends on the amount of vanillin used. Discoloration can range from a light tan to a very dark brown.
Vanilla color stabilizers can slow the discoloration, but they won't stop it forever. You also have to make sure you get a stabilizer for the soap you are making. M&P stabilizers don't work well in CP (I tried anyway, they were right though, it doesn't work well).
For the most part, I don't fight the discoloration. Instead, I use it to design my soap. For example, in my lavender vanilla soap, I used titanium dioxide and the natural discoloration to make an ombre soap. I love the way it looks too! See how I did it here.
I used BB Vanilla Select and a vanilla bourbon fo and lavender eo. It actually starts to discolor right away! Here in the final soap right after it is cut and through day 5. It won't really get much darker than that.
You can also separate your soap and use vanilla in one part of it to make a different look. Really, why fight the vanilla? Just use it to make a beautiful soap :)
What do you do about discoloring vanilla?
Wednesday, June 5, 2013
From The Soap Pot 6/5
Vanilla was my favorite smell today! I made my two favorite vanilla scented soaps. They will be ready July 6th.
Twilight Seduction Soap-smells like vanilla and mint
Serenity Soap-smells like vanilla and lavender.
Please note that each batch of soap is unique and these new ones may vary slightly from those pictured! It is an art after all :)
Twilight Seduction Soap-smells like vanilla and mint
Serenity Soap-smells like vanilla and lavender.
Please note that each batch of soap is unique and these new ones may vary slightly from those pictured! It is an art after all :)
Friday, May 17, 2013
From the Soap Pot 5/15
Oh, I've been having so much fun in my soap room! It smells so good in there right now. I have several soaps that are just about ready to go and will be added to my shops soon. I have also made some soaps that I know you just can't wait to get.
Karma Kollage: smells like patchouli! (ready June 1st)
Eucalyptus Mint: smells like eucalyptus and peppermint-contains oatmeal (ready June 1st)
Lemongrass Sage: smells like freshly mown lemons with a hint of garden fresh sage (ready June 1st)
Ambrosia: smells like oatmeal, milk, and honey-contains oatmeal, goat's milk, and honey :) (ready June 8th)
Carrot and Buttermilk: great face soap, smells lightly of ylang ylang, contains carrots, buttermilk, and willowbark extract (ready June 8th)
Karma Kollage: smells like patchouli! (ready June 1st)
Eucalyptus Mint: smells like eucalyptus and peppermint-contains oatmeal (ready June 1st)
Lemongrass Sage: smells like freshly mown lemons with a hint of garden fresh sage (ready June 1st)
Ambrosia: smells like oatmeal, milk, and honey-contains oatmeal, goat's milk, and honey :) (ready June 8th)
Carrot and Buttermilk: great face soap, smells lightly of ylang ylang, contains carrots, buttermilk, and willowbark extract (ready June 8th)
Thursday, April 25, 2013
From The Soap Pot
Ahh, it feels good to be making soap again! The past few months were so busy, it just didn't happen. Between Science Fair, getting ready for baby, and having baby I was always exhausted. I'm still exhausted, but I'm finding time to be creative and make my soap while the little one sleeps.
A few days ago I made my wonderful Dead Sea Mud Soap. It is made with Dead Sea mud (duh!) and the essential oils of peppermint, tea tree, rosemary, lemon, and grapefruit. I just love the way it leaves my skin feeling and I've had so many people tell me that it has helped them with their "problem" skin. I decided to make it round, I think face soap should be round. I don't know why, it just makes sense to me.
Next, I did a leather scented soap. I had intended for it to be mostly black and orange, with just a bit of white soap in it. I'm sure you can guess my inspiration :) However, I didn't make enough black and orange soap. Plus, my orange didn't come out quite as dark as I'd hoped. It looked great in the bowl, but not when I mixed it with the soap. For this batch, I did an In The Pot Swirl. You can see on the top, I save a little soap and did some swirls there as well. I think it looks nice, but I know what I'll do differently later. I had a lot of suggestions on names on Facebook, I think I will do a survey!
Today, I made another batch of one of my favorite. Lullaby Soap! It smells like a mix between Huggies lavender and chamomile bedtime stuff and baby powder. I love it. For this batch, I keep it simple. I divide the batch in two, color half pink and half blue. The blue is ultramarine blue from BB and the pink is a mix of fired up fuchsia, pink oxide, and red oxide (BB). I simply pour both colors at the same time on opposite sides of the mold. Then, I give the top a little swirl. Can't wait to cut it!
These will all be on my Etsy shop and my store in about a month when they are cured and ready to go!
A few days ago I made my wonderful Dead Sea Mud Soap. It is made with Dead Sea mud (duh!) and the essential oils of peppermint, tea tree, rosemary, lemon, and grapefruit. I just love the way it leaves my skin feeling and I've had so many people tell me that it has helped them with their "problem" skin. I decided to make it round, I think face soap should be round. I don't know why, it just makes sense to me.
Next, I did a leather scented soap. I had intended for it to be mostly black and orange, with just a bit of white soap in it. I'm sure you can guess my inspiration :) However, I didn't make enough black and orange soap. Plus, my orange didn't come out quite as dark as I'd hoped. It looked great in the bowl, but not when I mixed it with the soap. For this batch, I did an In The Pot Swirl. You can see on the top, I save a little soap and did some swirls there as well. I think it looks nice, but I know what I'll do differently later. I had a lot of suggestions on names on Facebook, I think I will do a survey!
Today, I made another batch of one of my favorite. Lullaby Soap! It smells like a mix between Huggies lavender and chamomile bedtime stuff and baby powder. I love it. For this batch, I keep it simple. I divide the batch in two, color half pink and half blue. The blue is ultramarine blue from BB and the pink is a mix of fired up fuchsia, pink oxide, and red oxide (BB). I simply pour both colors at the same time on opposite sides of the mold. Then, I give the top a little swirl. Can't wait to cut it!
These will all be on my Etsy shop and my store in about a month when they are cured and ready to go!
Thursday, March 28, 2013
New Baby Soap
I have been playing around with some ideas for a really gentle soap that is specially designed for baby skin. I truly love the Naked Shea soap, but I wanted something even gentler. I wanted something that was soothing, creamy, and skin loving.
Here is what I decided I needed:
I creamed the colloidal (finely ground) oatmeal into the goat milk before freezing, which I'm not sure was a good idea. While mixing goat milk and lye makes a stinky orange mess anyway, I think adding the oatmeal early also resulting in the orange speckles in the soap. It doesn't smell bad, so I don't think it is going to effect the quality of the final soap.
I melted the shea and cocoa butters over low heat and added them at light trace. I've noticed that sometimes when I used butters, the final bars can turn out grainy, so I treated these with the same care I would use if they were going into a balm.
I used a round mold because it seems that baby soap should be round. I don't know why I decided this, but I did. I'm glad I did, I think it looks perfect! I can't wait to be able to use one of these and give you some feedback on them. I probably wouldn't be so anxious if my target for this soap wasn't to very precious and delicate!
I don't have much of a name for it right now. The best I have is Baby Soap (oh yes, I'm that original) or Milk and Aloe Baby Soap (even better!). If you have any ideas, feel free to share.
Here is what I decided I needed:
- Aloe-who doesn't remember their mom keeping an aloe plant in the house and any time there was anything wrong, you got rubbed down with it?
- Goat milk-gives the soap a rich, creamy texture and adds to the skin-softening properties.
- Oatmeal-good for all sorts of skin problems, so it is going to be good for babies too.
- Super skin conditioning oils: I went with avocado, shea butter, and cocoa butter. How luxurious are those together? Even without all the other goodies, that would make a great bar of soap.
I creamed the colloidal (finely ground) oatmeal into the goat milk before freezing, which I'm not sure was a good idea. While mixing goat milk and lye makes a stinky orange mess anyway, I think adding the oatmeal early also resulting in the orange speckles in the soap. It doesn't smell bad, so I don't think it is going to effect the quality of the final soap.
I melted the shea and cocoa butters over low heat and added them at light trace. I've noticed that sometimes when I used butters, the final bars can turn out grainy, so I treated these with the same care I would use if they were going into a balm.
I used a round mold because it seems that baby soap should be round. I don't know why I decided this, but I did. I'm glad I did, I think it looks perfect! I can't wait to be able to use one of these and give you some feedback on them. I probably wouldn't be so anxious if my target for this soap wasn't to very precious and delicate!
I don't have much of a name for it right now. The best I have is Baby Soap (oh yes, I'm that original) or Milk and Aloe Baby Soap (even better!). If you have any ideas, feel free to share.
Sunday, February 3, 2013
Soap Packaging Revisited
Is there a soap maker out there that hasn't gone back and forth about soap packaging? If so, please explain how you made this decision and was it easy?
For me, this has been the hardest part of soapmaking!
Here is my original packaging:
The cigar bands were easy, cheap, and created minimal packaging. Plus, the consumer could smell AND see the soaps before buying. However, they didn't protect the soaps well and I had problems with them slipping off or getting torn with moving them so much.
Next I tried shrink wrap bags:
The label was printed on cardstock, cut, then placed on the soap before it was shrink wrapped. The wrap is still cheap. The soaps were very protected and you could see what they looked like. But, you couldn't smell the soap and the shrink wrap was hard to get off. Plus, the bags were too large. So, you could get the end and have one end open (I'll tell you this didn't always work out so well if you weren't careful cutting) or tape the end down before shrinking (this didn't look great).
I've recently found soap bands for shrink wrap. They are open on both ends and already sized for most soaps, so you just center your soap and shrink wrap. They also have a perforated tab for easy opening. It also sounds like it is easy to make them smaller for smaller bars. So, that would solve the size problem, smelling problem, and the hard-to-get-open problem.
I decided to try using paper wrapping and really pretty paper bands:
I printed a label and stuck it to the paper. I won't lie, I LOVE the way these look. I used different handmade papers for different scents and simple colored paper underneath. The soaps are protected and you can smell them through the paper. It is also nice because I can make it fit any bar. But, I have to leave on unwrapped for people to see. Plus, the cutting and wrapping is a little labor intensive. With the number of bands I can get out of a sheet of handmade paper, it isn't too much more than shrink wrap, but then you add your time to that! Plus, buying different sheets of handmade paper for the soaps and making sure I don't run out is harder to keep up with.
Last option, soap boxes (never tried):
I've thought about boxes, but they are the more expensive option. On the plus side, your soap is well protected. It is easy to remove the soap to see and smell, but easy to put back as well. They are really easy to pop open, stuff your soap in and slap a label on. They are most commonly sold as white or kraft color and come with a variety of cut-outs. I even found a site that does colored boxes (expensive unless ordering A LOT!). My biggest concern with this option has been the cost and the fact that it would only be one size, so I'd have to figure out something else for smaller bars. However, the time I'd save compared to wrapping in paper may be worth it! I could also offer the option for no box online to save people money or maybe do a box recycling program (I haven't thought that one through much).
So, what do you think? I'm looking for an attractive, easy, cost-effective, consumer-friendly method for packaging my soaps. My options are shrink wrap bands (cheap, quick, see-through, multi-sizes), paper (BEAUTIFUL, labor-intensive, not too expensive, not see through, mulit-sizes), or boxes (more costly, quick, easy open, one-size).
Which option would you like to see or think would be the best for me?
For me, this has been the hardest part of soapmaking!
Here is my original packaging:
The cigar bands were easy, cheap, and created minimal packaging. Plus, the consumer could smell AND see the soaps before buying. However, they didn't protect the soaps well and I had problems with them slipping off or getting torn with moving them so much.
Next I tried shrink wrap bags:
The label was printed on cardstock, cut, then placed on the soap before it was shrink wrapped. The wrap is still cheap. The soaps were very protected and you could see what they looked like. But, you couldn't smell the soap and the shrink wrap was hard to get off. Plus, the bags were too large. So, you could get the end and have one end open (I'll tell you this didn't always work out so well if you weren't careful cutting) or tape the end down before shrinking (this didn't look great).
I've recently found soap bands for shrink wrap. They are open on both ends and already sized for most soaps, so you just center your soap and shrink wrap. They also have a perforated tab for easy opening. It also sounds like it is easy to make them smaller for smaller bars. So, that would solve the size problem, smelling problem, and the hard-to-get-open problem.
I decided to try using paper wrapping and really pretty paper bands:
I printed a label and stuck it to the paper. I won't lie, I LOVE the way these look. I used different handmade papers for different scents and simple colored paper underneath. The soaps are protected and you can smell them through the paper. It is also nice because I can make it fit any bar. But, I have to leave on unwrapped for people to see. Plus, the cutting and wrapping is a little labor intensive. With the number of bands I can get out of a sheet of handmade paper, it isn't too much more than shrink wrap, but then you add your time to that! Plus, buying different sheets of handmade paper for the soaps and making sure I don't run out is harder to keep up with.
Last option, soap boxes (never tried):
| Pic from Elements Bath & Body |
I've thought about boxes, but they are the more expensive option. On the plus side, your soap is well protected. It is easy to remove the soap to see and smell, but easy to put back as well. They are really easy to pop open, stuff your soap in and slap a label on. They are most commonly sold as white or kraft color and come with a variety of cut-outs. I even found a site that does colored boxes (expensive unless ordering A LOT!). My biggest concern with this option has been the cost and the fact that it would only be one size, so I'd have to figure out something else for smaller bars. However, the time I'd save compared to wrapping in paper may be worth it! I could also offer the option for no box online to save people money or maybe do a box recycling program (I haven't thought that one through much).
So, what do you think? I'm looking for an attractive, easy, cost-effective, consumer-friendly method for packaging my soaps. My options are shrink wrap bands (cheap, quick, see-through, multi-sizes), paper (BEAUTIFUL, labor-intensive, not too expensive, not see through, mulit-sizes), or boxes (more costly, quick, easy open, one-size).
Which option would you like to see or think would be the best for me?
Wednesday, January 30, 2013
CP/MP (Magma) Soap
I have been playing with the idea of incorporating MP soap into my cold process soap. I've seen some cute ideas using embedded shapes and such. I also found a tutorial on the Soap Queen blog about magma soap.
In magma soap, you don't create shaped embeds made from MP soap, but you pour it in the soap with your CP soap, just like you would for normal CP swirls. Hmmm...sounds interesting!
I decided to give this a try with a Valentine's Day inspired soap. {Side note: I love making holiday soaps because I can experiment with whatever I want and people know they won't be back until next year. Usually, they don't even mind if it isn't the same soap next year! Now, back to the point...} I love making soap using pinks and reds. There is something about those colors that I just adore. I will probably never decorate my house with them, but I love them anyway. Well, this year, I decided to throw in a little purple too!
The fragrance I chose has a higher vanilin content, so it will discolor. I used a color stablilizer (actually made for MP, but it usually works well enough in CP) to keep it from turning brown. I used clear MP soap colored with a pink mica that looked so lovely that I thought of another project from it. I separated my CP soap into 4 containers; one I left uncolored (I probably should have added titanium dioxide to make it white, but I didn't), one was red oxide, another fired up fuchsia, and last was violet ultramarine with a little blue added (all from BB!).
I poured the white in first. I poured it in lines lengthwise down the mold. Then, I did each of the CP colors and the MP pink came last. I repeated with the rest of the white, red, and MP, but I didn't use all of the pink or violet. I tried doing a quick swirl like the tutorial, but I think I just drug huge chunks of MP around (oops, I took too long). Then, I used the left over pink and violet to do widthwise lines along the mold. I used a skewer to swirl just that very top layer, which was really easy because the MP had cooled, making it impossible for the skewer to go through that :) I added little MP hearts I had made using white soap and red oxide. I put the whole thing in the fridge. Since it has MP soap in it, the high temps during the gel phase would probably not work in my favor!
Here are the finished bars. You can see that my hearts on the top didn't quite work out right. I should have figured out a way to get them to stand up or lined up with my cut lines. I have also decided that I should not have tried to drag a skewer through to swirl it, I'm pretty sure it would have looked better. My pink and violet are not as vibrant as they were, but that could be due to the fact that the soap didn't gel OR the fo contains vanilla and will be changing my colors over time. Overall, I'm happy though!
These are already up on the website, but they won't ship until February 6th.
In magma soap, you don't create shaped embeds made from MP soap, but you pour it in the soap with your CP soap, just like you would for normal CP swirls. Hmmm...sounds interesting!
I decided to give this a try with a Valentine's Day inspired soap. {Side note: I love making holiday soaps because I can experiment with whatever I want and people know they won't be back until next year. Usually, they don't even mind if it isn't the same soap next year! Now, back to the point...} I love making soap using pinks and reds. There is something about those colors that I just adore. I will probably never decorate my house with them, but I love them anyway. Well, this year, I decided to throw in a little purple too!
The fragrance I chose has a higher vanilin content, so it will discolor. I used a color stablilizer (actually made for MP, but it usually works well enough in CP) to keep it from turning brown. I used clear MP soap colored with a pink mica that looked so lovely that I thought of another project from it. I separated my CP soap into 4 containers; one I left uncolored (I probably should have added titanium dioxide to make it white, but I didn't), one was red oxide, another fired up fuchsia, and last was violet ultramarine with a little blue added (all from BB!).
I poured the white in first. I poured it in lines lengthwise down the mold. Then, I did each of the CP colors and the MP pink came last. I repeated with the rest of the white, red, and MP, but I didn't use all of the pink or violet. I tried doing a quick swirl like the tutorial, but I think I just drug huge chunks of MP around (oops, I took too long). Then, I used the left over pink and violet to do widthwise lines along the mold. I used a skewer to swirl just that very top layer, which was really easy because the MP had cooled, making it impossible for the skewer to go through that :) I added little MP hearts I had made using white soap and red oxide. I put the whole thing in the fridge. Since it has MP soap in it, the high temps during the gel phase would probably not work in my favor!
Here are the finished bars. You can see that my hearts on the top didn't quite work out right. I should have figured out a way to get them to stand up or lined up with my cut lines. I have also decided that I should not have tried to drag a skewer through to swirl it, I'm pretty sure it would have looked better. My pink and violet are not as vibrant as they were, but that could be due to the fact that the soap didn't gel OR the fo contains vanilla and will be changing my colors over time. Overall, I'm happy though!
These are already up on the website, but they won't ship until February 6th.
Monday, January 28, 2013
Fifty Shades of Soap
In one of my recent orders, I received a fo called Fifty Shades as a free gift. I am not a fan of the book (different topic), but I swooned over this scent! It is masculine and sexy and amazing! I have a feeling the ladies will love this one too though.
You can tell my inspiration for the soap came from the name. I really considered creating an ombre soap, but decided that I liked the idea of something a lot less even. So, I ended up separating my soap into 8 containers with varying amounts of black oxide and randomly dumping different amounts in the mold. I didn't even bother with any other swirling! I'll admit that I was worried it would look bad, but I actually love them.
I think they look perfect and smell absolutely amazing.
These will be available February 17th.
You can tell my inspiration for the soap came from the name. I really considered creating an ombre soap, but decided that I liked the idea of something a lot less even. So, I ended up separating my soap into 8 containers with varying amounts of black oxide and randomly dumping different amounts in the mold. I didn't even bother with any other swirling! I'll admit that I was worried it would look bad, but I actually love them.
I think they look perfect and smell absolutely amazing.
These will be available February 17th.
Monday, January 14, 2013
New Soap; Needs a Name...
I purchased an essential oil blend called "Mother Earth." It is a blend of Bergamot, Cassia Root, Cedarwood, Nutmeg, Lavadin, Peppermint! It is so good. I can't even describe it; maybe a little earthy, minty, spicy? I had meant to make the soap with it a while back, but that didn't happen.
I did get it done last weekend though!
I colored it with micas and oxides. My inspiration was the name of the eo blend! It is brown on the bottom (sort of, I should have mixed better), green in the middle and blue on top. I did a hanger swirl (check out how to do it here) to get my layers to mix a little. I really like the way it looks! I wasn't sure about the scent at first, but after curing for a few days, I love it. It is lightly scented because I didn't want to go overboard. It smells mostly minty, but the other scents come through nicely.
Can you think of any good names?
It will be available on the website around February 10th!
I did get it done last weekend though!
I colored it with micas and oxides. My inspiration was the name of the eo blend! It is brown on the bottom (sort of, I should have mixed better), green in the middle and blue on top. I did a hanger swirl (check out how to do it here) to get my layers to mix a little. I really like the way it looks! I wasn't sure about the scent at first, but after curing for a few days, I love it. It is lightly scented because I didn't want to go overboard. It smells mostly minty, but the other scents come through nicely.
Can you think of any good names?
It will be available on the website around February 10th!
Monday, January 7, 2013
Rebatch! A Success...
As a soapmaker, I have always cringed at the thought of having to rebatch soap. HELLO! IT WAS SUPPOSED TO WORK THE FIRST TIME!!! But, it happens. Usually, I end up chopping it up and giving it away to friends and family because I just can't bring myself to sell something that did not turn out anything like my vision. Once, I made it into soap balls and sold some, gave others away to kids at the farmer's markets.
I have recently found out that rebatching your soap does not have to be all bad. I was reading about rebatching adventures over at Great Cakes Soapworks and I thought about my bowl of soap shreds and scraps and decided to give it a try.
Well, my first batch did not go well. I don't think I let it cook long enough or didn't add enough liquid. I might try rebatching the rebatch :)
My second try was much better! Here is my process...
First, add soaps shreds and small chunks to your crock pot. You can see, this is from lots of different batches. I added 8 oz of water for 2 lbs of soap because some of the shreds were of unknown origin.
I let it cook a really long time on low heat. I kept going in to stir. Eventually, it looked really moist and mostly uniform. I added a few white balls and pink chunks to give it a little something extra. I put those in and let them sit in the hot soap for a while. I didn't want them to dissolve into my mix, but I wanted them to absorb a little moisture and be incorporated well.
This is my soap in the mold. I used buttercream and snickerdoodle fo, which is why it is so brown. Because it was pretty liquid, this step was pretty easy. I used a big spoon to put it in the mold, I wanted to make sure I got it into the corners. Then, I tapped (slammed) my mold on the counter a few times (lots and lots) to really pack everything down.
He is the soap out of the mold the next day. You can see it have some discoloring to do, but I think that will help some of the chunks to stand out more. I'm going to let them sit for a bit to let the water evaporate. I really don't think I over did it though because these are pretty firm already. Then I'll clean them up and go from there.
I know they aren't the prettiest soaps ever and really, I should probably keep my scraps separate, but I found a use of all the scrap soap we end up with, but never know what to do with it. Stay tuned, these will probably go up on the website soon. I'm kind of thinking about selling them to raise money for another turtle nest. What do you think?
I'll let you know how the rebatch of my rebatch goes.
I have recently found out that rebatching your soap does not have to be all bad. I was reading about rebatching adventures over at Great Cakes Soapworks and I thought about my bowl of soap shreds and scraps and decided to give it a try.
Well, my first batch did not go well. I don't think I let it cook long enough or didn't add enough liquid. I might try rebatching the rebatch :)
My second try was much better! Here is my process...
First, add soaps shreds and small chunks to your crock pot. You can see, this is from lots of different batches. I added 8 oz of water for 2 lbs of soap because some of the shreds were of unknown origin.
I let it cook a really long time on low heat. I kept going in to stir. Eventually, it looked really moist and mostly uniform. I added a few white balls and pink chunks to give it a little something extra. I put those in and let them sit in the hot soap for a while. I didn't want them to dissolve into my mix, but I wanted them to absorb a little moisture and be incorporated well.
This is my soap in the mold. I used buttercream and snickerdoodle fo, which is why it is so brown. Because it was pretty liquid, this step was pretty easy. I used a big spoon to put it in the mold, I wanted to make sure I got it into the corners. Then, I tapped (slammed) my mold on the counter a few times (lots and lots) to really pack everything down.
He is the soap out of the mold the next day. You can see it have some discoloring to do, but I think that will help some of the chunks to stand out more. I'm going to let them sit for a bit to let the water evaporate. I really don't think I over did it though because these are pretty firm already. Then I'll clean them up and go from there.
I know they aren't the prettiest soaps ever and really, I should probably keep my scraps separate, but I found a use of all the scrap soap we end up with, but never know what to do with it. Stay tuned, these will probably go up on the website soon. I'm kind of thinking about selling them to raise money for another turtle nest. What do you think?
I'll let you know how the rebatch of my rebatch goes.
Saturday, October 27, 2012
New Soaps Available!
We are in the process of putting up a new website, so I'm not adding the new seasonal soaps I made to the old one. But, I wanted to share them with you and give you the opportunity to get yours since they won't last long. If you are interested in any of these, feel free to send me an email at hmwalls (at) honunaturals (dot) com, or message me on facebook.
Pumpkin soaps, made from locally grown pumpkin!
Christmas Soaps
All seasonal scents can also be special ordered as fizzy tub treats or wax tarts for candle warmers.
Pumpkin soaps, made from locally grown pumpkin!
![]() |
| Chocolate Pumpkin soap that smells so good you might just need to lather again. Buy two and store one in the closet until you need it, no need for scented fabric softeners :) |
![]() |
| Pumpkin Spice soap is made with cinnamon, ginger, clove, and a touch of orange. |
All seasonal scents can also be special ordered as fizzy tub treats or wax tarts for candle warmers.
Thursday, October 11, 2012
In The Mold HP Soap
I have tried hot process soap in the past. While I like that the soap is ready quicker, I haven't been thrilled with the texture of the soap. It always felt a little spongy to me. I have worked really hard to packed the soap down to combat this. The was much mushing of soap, banging of the mold, more mushing, and more banging. But, it just wasn't as smooth and glossy. Although, you can still do very nice swirls...
I read about "In The Mold" hot process and couldn't really try it because the molds I was using were not up to a trip through the oven. I started using a silicone log mold and asked the wonderful BB customer service peeps if it could make it in the oven. They said as long as it was under 200, it would be fine!
So, I made a batch of my Naked Shea soap. Dumped in the mold. Put the mold on a baking sheet. Set my oven for 170. AND in the oven it went. I set the timer for 2 hours, but I ended up checking on it every 15 minutes anyway. After about an hour is had completely gelled (it is a smaller mold) and by an hour and a half, it was starting to bubble. I turned off the oven, left the door closed and pulled the soap out the next morning. It was a little funny looking on top, but it was very solid. I didn't have time to cut it, but I was very concerned. I had seen lots of bubbles and was worried about those staying behind. However, when I cut it that afternoon, it was lovely! No air bubbles at all! Just beautiful, smooth soap that is already hard and completely ready to go. It did feel a little oily on the surface, so I put it on some paper bags to "dry" out.
I have to say that I'm really impressed. I know it won't work for all soaps. 170 is too high for some essential oils and even some fragrance oils, but for unscented soaps or scents with high flash points, this is a great way to get your soaps some quicker.
Last night, I made a batch of Chocolate Pumpkin soap with orange and black swirls. It looks and smells great! I made too much black soap, so the orange is a little hard to see, but that has nothing to do with the oven.
If you want to try the make hot process soap in the mold, here are my tips:
I read about "In The Mold" hot process and couldn't really try it because the molds I was using were not up to a trip through the oven. I started using a silicone log mold and asked the wonderful BB customer service peeps if it could make it in the oven. They said as long as it was under 200, it would be fine!
So, I made a batch of my Naked Shea soap. Dumped in the mold. Put the mold on a baking sheet. Set my oven for 170. AND in the oven it went. I set the timer for 2 hours, but I ended up checking on it every 15 minutes anyway. After about an hour is had completely gelled (it is a smaller mold) and by an hour and a half, it was starting to bubble. I turned off the oven, left the door closed and pulled the soap out the next morning. It was a little funny looking on top, but it was very solid. I didn't have time to cut it, but I was very concerned. I had seen lots of bubbles and was worried about those staying behind. However, when I cut it that afternoon, it was lovely! No air bubbles at all! Just beautiful, smooth soap that is already hard and completely ready to go. It did feel a little oily on the surface, so I put it on some paper bags to "dry" out.
I have to say that I'm really impressed. I know it won't work for all soaps. 170 is too high for some essential oils and even some fragrance oils, but for unscented soaps or scents with high flash points, this is a great way to get your soaps some quicker.
Last night, I made a batch of Chocolate Pumpkin soap with orange and black swirls. It looks and smells great! I made too much black soap, so the orange is a little hard to see, but that has nothing to do with the oven.
If you want to try the make hot process soap in the mold, here are my tips:
- Double check the flash points for any scents. It should be higher than your oven temp.
- Set your oven between 170-185 and watch your soap the first time. The size of your batch will affect cook time.
- Leave your soap in the oven to cool slowly when cooked.
- Ask your mold maker if it will withstand the oven temps (that would be messy).
- Protect your oven with something under the mold.
- If you try this with a milk or honey soap, come back and tell me how it worked out. I'm nervous about trying it :)
- Remember, one way or another it will be soap, even if it is ugly soap.
Thursday, July 19, 2012
Euphoria Spa Soap
I've read about salt soaps and I've been wanting to make them, but I had several concerns. First, salt bars have to be cut really early or they are to hard/brittle to cut. I don't know how my molds would hold up in an oven and a toddler makes it hard to get back in time to cut soap. But, I found an idea for salt soaps using individual molds! Perfect!
As many soapmakers know, extra minerals in soap will reduce the lather of the soap. People with hard water know this too. Most soapmakers add a little extra coconut oil to compensate, but several were concerned that too much coconut would make the soap drying to your skin. I decided to go with 50% coconut oil, but I've read that others go up to 70%. I then did 30% olive oil for moisturizing and 20% palm, but I don't know that I needed the palm to make them hard because I think the salt does that for you.
I couldn't decide what scent to make these. I wanted it to be uplifting and wonderful to go along with a spa or beach experience. I found a small bottle of an essential oil blend called "euphoria" and I thought that would be perfect. I really liked the smell of the blend when I bought it, but never could find the right soap to use it in! I know, that is just silly, but I'm glad I saved it.
I read several blogs about other's salt soaps and I decided to use a 1:1 salt:oils ratio. I also read that you have to be ready to move once you add the salt, so I had my everything ready to go! I mixed to a very thin trace and added my eo blend and mixed some more. I think the essential oil might have contributed to a little bit of acceleration, but I didn't experiment with it before, so I'm not sure (this is why you should always test first...oops). I added my salt and for some unknown reason, I tried to stick blend it in. I quickly figured out that it wasn't a good idea, so I hand-stirred. I started trying to get it in my individual molds and it was really thick. I meant to smoosh it down before I filled up the molds completely, but I realized I had a problem and panicked. So, I just put more soap on top of the soap in the mold. The result looks like two layers smooshed together.
As you can see, the soap was thick and hard to work with, but I smoothed it out nicely. I used my blunt-edged cutter to shave the tops off before I removed them from the molds. They came out of the molds perfectly! I'm so glad I used a smooth mold because the bars are so smooth and glossy on those sides.
So, why did I panic? I didn't take into account how much salt was being added when I made my recipe! So, I had more soap than would fit in my mold. Of course, I didn't have any other molds lined or available. I usually have several extra molds lined for such an occasion! So, that was oops #2. I found some bar molds to use and the soap went in and came out nicely.
Lessons for next time:
As many soapmakers know, extra minerals in soap will reduce the lather of the soap. People with hard water know this too. Most soapmakers add a little extra coconut oil to compensate, but several were concerned that too much coconut would make the soap drying to your skin. I decided to go with 50% coconut oil, but I've read that others go up to 70%. I then did 30% olive oil for moisturizing and 20% palm, but I don't know that I needed the palm to make them hard because I think the salt does that for you.
I couldn't decide what scent to make these. I wanted it to be uplifting and wonderful to go along with a spa or beach experience. I found a small bottle of an essential oil blend called "euphoria" and I thought that would be perfect. I really liked the smell of the blend when I bought it, but never could find the right soap to use it in! I know, that is just silly, but I'm glad I saved it.
I read several blogs about other's salt soaps and I decided to use a 1:1 salt:oils ratio. I also read that you have to be ready to move once you add the salt, so I had my everything ready to go! I mixed to a very thin trace and added my eo blend and mixed some more. I think the essential oil might have contributed to a little bit of acceleration, but I didn't experiment with it before, so I'm not sure (this is why you should always test first...oops). I added my salt and for some unknown reason, I tried to stick blend it in. I quickly figured out that it wasn't a good idea, so I hand-stirred. I started trying to get it in my individual molds and it was really thick. I meant to smoosh it down before I filled up the molds completely, but I realized I had a problem and panicked. So, I just put more soap on top of the soap in the mold. The result looks like two layers smooshed together.
![]() |
| Not so smooth because it didn't pour nicely. The other three cavities are filled with soaps that I was testing FOs on. See, I do test! |
As you can see, the soap was thick and hard to work with, but I smoothed it out nicely. I used my blunt-edged cutter to shave the tops off before I removed them from the molds. They came out of the molds perfectly! I'm so glad I used a smooth mold because the bars are so smooth and glossy on those sides.
![]() |
| I do wish they were more even in the middle, but I'm still in love! |
So, why did I panic? I didn't take into account how much salt was being added when I made my recipe! So, I had more soap than would fit in my mold. Of course, I didn't have any other molds lined or available. I usually have several extra molds lined for such an occasion! So, that was oops #2. I found some bar molds to use and the soap went in and came out nicely.
![]() |
| Not the molds I would have preferred, but they worked nicely. |
Lessons for next time:
- Use an FO or EO that I've already tested and does not accelerate trace. The soap does a great job of that.
- Resize my recipe to account for the salt.
- Get it into the mold quicker and maybe get a helper to smoosh it into the mold evenly.
- Euphoria smells even better in soap than I expected. Buy more!
Monday, July 9, 2012
Landscape Soap
I saw this idea on the soap challenge at Great Cakes Soapworks blog. I didn't have time to participate because of school and all those pesky things teachers do at the end of the year, but I saved the ideas for later. I loved the idea of a landscape soap and I really wanted to try one.
I decided to make my Twilight Seduction soap a landscape soap. I wanted it to look like twilight over water. So, I studied lots of pictures of twilight, which isn't easy because most of what came up on the first search involved Edward and Bella. Not helpful! But, I finally found some pictures that I loved.
I decided that for my first try, I would use fewer colors than are generally associated with sunsets. I wanted the moon high in the sky, but when I made the batch for my moon, I didn't think about the fact that the sun is still present. Oh well, I'll do that next time. My fragrance is a blend of vanilla and mint. I didn't want the vanilla to discolor the entire soap, so I only used vanilla half of the soap. So, here are the steps I took for my masterpiece.
1. Make soap. This step is critical.
2. Divide soap in half. Scent half that will make up the water with a vanilla blend, add shredded soap to look like reflections, and color with a mix of ultramarine blue, violet, and black oxide (more next time.) Pout into bottom of mold.
5. Add white thin soap log that you spent a lot of time trying to make into a nice circle. Next time, don't let the embed soap sit so long. It was hard to make round.
6. Color the last bit of soap blue, violet, and black (darker next time, but not as dark as the water). Cover pink layer and that pesky moon. Don't smooth it out. It looks nice like that.
7. Wrap up nicely for gel or not as you prefer. Clean up the mess you made.
8. Pull out of mold and admire. Then cut.
9. Don't fret about sad looking water layer. The vanilla will make it darker. A lot darker I hope.
10. Celebrate the discoloring power of vanilla, for once:)
Notes for next time:
I decided to make my Twilight Seduction soap a landscape soap. I wanted it to look like twilight over water. So, I studied lots of pictures of twilight, which isn't easy because most of what came up on the first search involved Edward and Bella. Not helpful! But, I finally found some pictures that I loved.
I decided that for my first try, I would use fewer colors than are generally associated with sunsets. I wanted the moon high in the sky, but when I made the batch for my moon, I didn't think about the fact that the sun is still present. Oh well, I'll do that next time. My fragrance is a blend of vanilla and mint. I didn't want the vanilla to discolor the entire soap, so I only used vanilla half of the soap. So, here are the steps I took for my masterpiece.
1. Make soap. This step is critical.
2. Divide soap in half. Scent half that will make up the water with a vanilla blend, add shredded soap to look like reflections, and color with a mix of ultramarine blue, violet, and black oxide (more next time.) Pout into bottom of mold.
3. Scent other half of soap with mint eo blend. Divide this into three equalish portions in plastic cups. Color one yellow (use brighter yellow next time). Spoon carefully on top of water. I liked this because it didn't break the other layer and added texture.
4. Color other portion pink/orange (brighter next time). Spoon over yellow.5. Add white thin soap log that you spent a lot of time trying to make into a nice circle. Next time, don't let the embed soap sit so long. It was hard to make round.
6. Color the last bit of soap blue, violet, and black (darker next time, but not as dark as the water). Cover pink layer and that pesky moon. Don't smooth it out. It looks nice like that.
7. Wrap up nicely for gel or not as you prefer. Clean up the mess you made.
8. Pull out of mold and admire. Then cut.
9. Don't fret about sad looking water layer. The vanilla will make it darker. A lot darker I hope.
10. Celebrate the discoloring power of vanilla, for once:)
Notes for next time:
- Make the moon round, not oval.
- Make the water darker.
- Add a setting sun.
- Make the colors brighter
- Make less of a mess
Saturday, July 7, 2012
Twilight Seduction Soap
I made this soap last week and I have to say that I was surprised that I only got one comment about sparkling vampires. In truth, the name has nothing to do with vampires. I have three scents that I grouped together because they are deep, rich, and wonderful. The first, I decided to name Moonlight Temptation because one of the fragrances in the blend was called moonlight. I wanted the other two names to tie into the first. Moonlight is a dark chocolate blend and this one is vanilla, I wanted to come up with something to represent light.
I brainstormed dawn, daylight, sunrise, and a few others that didn't catch me. When twilight came to mind, I loved the name Twilight Seduction. I knew that most would assume it had something to do with the movies or books, but it truly doesn't. The three names I decided on are Moonlight Temptation, Twilight Seduction, and Midnight Enchantment. See, nothing to do with vampires.
Website Description:
I brainstormed dawn, daylight, sunrise, and a few others that didn't catch me. When twilight came to mind, I loved the name Twilight Seduction. I knew that most would assume it had something to do with the movies or books, but it truly doesn't. The three names I decided on are Moonlight Temptation, Twilight Seduction, and Midnight Enchantment. See, nothing to do with vampires.
![]() |
| I was going for the moon over the water with the colors of twilight. I even put moonlight shimmers in the water. Not bad for my first try! |
"Twilight
is that moment of time in between two opposing periods of each day. The time
when light still exists in the world as darkness slowly takes over and day
becomes night. To create the scent of twilight, warm vanilla and cool
peppermint are brought together to exist as that moment in which opposing
forces vie for your full attention. In that moment neither exists without the
other and you will be drawn into the seductive embrace of Twilight Seduction.
Shea
and cocoa butter create a creamy bar of soap that will leave behind silky soft
skin and take away that dry, itchy feeling. Let the thick lather surround you
as it washes away your worries and leave you feeling relaxed, refreshed, and
emotionally recharged."
Friday, June 22, 2012
When Good Soaps Go Bad
This week has been filled with making milk and honey soaps. I have been making smaller batches because I was testing out the scents and playing with some new techniques. I decided that I wanted to get all three of my different milk and honey (BooBees) soaps made this week.
My first two batches were wonderful. They did trace pretty quickly (I'm thinking a whisk will be used instead of a stick blender), but other than that, they were lovely. I used concentrated goat milk, so I mixed the water you would use to dilute the milk and mixed in the lye. I stuck that in the fridge. I mixed my oils and beeswax, melted it all together, and stuck it in the fridge. Then, I got everything else together. I poured out my fragrance, my honey, my very cold (not frozen) milk, I lined the mold with bubble wrap, and I put a little pink colorant in a squeeze bottle for some pink swirls. Remember, the BooBees Collection was created to donate money to The Breast Cancer Research Foundation, read about it here. I mixed the lye into my oils, mixed until it was just stable enough and then I put in my fragrance. I separated out just a few spoonfuls into my squeeze bottle and shook it really well. Then, I added my milk and honey to my main batch and mixed.
My first batch of Ambrosia soap was awesome! Read about it here. The soap turned a beautiful honey color and the pink is so light, that I just adore it. My next batch was called Sultry. It is a spicy, tropical scent that I just can't get enough of. I really find myself going in and picking up the soap just to sniff it. This time I put some of the pink on the bottom and sides of the mold. This soap is darker because of the vanilla in the fragrance, but I love it anyway. Again, this batch traced quickly, but I kept it cool and stuck it in the fridge to keep it from overheating. It was ready to be cut sooner than normal, but that was okay because I check my soaps often. I can never just let them sit.
My latest batch was made the same way. It is the same formula with a different scent. Celebration is a blend of fresh strawberries and bubbly champagne that I just adore. I even sprinkled a little glitter on top to go along with the name! Everything went along the same. The temperatures were kept low. I put the entire batch in the fridge to keep it from overheating. When I checked it, it was nice and hard, so I unmolded it. At first glance, it was just perfect! Sparkly, fresh, and golden!
The flip side is another story. Apparently, despite being in the fridge, it overheated anyway. So, that lovely brown goo is caramelized sugar! Good for peanut brittle and caramel; bad for soap :(
Here are my two positives:
My first two batches were wonderful. They did trace pretty quickly (I'm thinking a whisk will be used instead of a stick blender), but other than that, they were lovely. I used concentrated goat milk, so I mixed the water you would use to dilute the milk and mixed in the lye. I stuck that in the fridge. I mixed my oils and beeswax, melted it all together, and stuck it in the fridge. Then, I got everything else together. I poured out my fragrance, my honey, my very cold (not frozen) milk, I lined the mold with bubble wrap, and I put a little pink colorant in a squeeze bottle for some pink swirls. Remember, the BooBees Collection was created to donate money to The Breast Cancer Research Foundation, read about it here. I mixed the lye into my oils, mixed until it was just stable enough and then I put in my fragrance. I separated out just a few spoonfuls into my squeeze bottle and shook it really well. Then, I added my milk and honey to my main batch and mixed.
![]() |
| Ambrosia-Love the swirls! |
![]() |
| Sultry-Needs to be cleaned up, but it is lovely. |
My latest batch was made the same way. It is the same formula with a different scent. Celebration is a blend of fresh strawberries and bubbly champagne that I just adore. I even sprinkled a little glitter on top to go along with the name! Everything went along the same. The temperatures were kept low. I put the entire batch in the fridge to keep it from overheating. When I checked it, it was nice and hard, so I unmolded it. At first glance, it was just perfect! Sparkly, fresh, and golden!
![]() | |
Here are my two positives:
- Because I did put this in the fridge, it did not get hot enough to volcano and make a big, hot, caustic mess.
- I might be able to rebatch this into something ugly, but usable.
Thursday, June 21, 2012
BooBees Ambrosia Soap
Did you know that in Greek mythology, ambrosia was food or drink for the gods? It provided them with ageless immortality and had to ability to wash away the effects of the years. Many believe that ambrosia was supposed to be a type of honey and the association to ageless immortality is due to honey's ability to heal. Even today, honey is often used by many because of its ability to heal. Read more about the benefits of honey here.
All BooBees products are formulated with goat's milk and honey to give your the richest, creamiest bar of soap possible. Goat's milk, like other milk, contains lactic acid which helps dissolve dead skin cells. It also contains a good amount of cream which is full of fats that help your skin look healthier because it provides extra moisture. In soap, goat's milk creates a creamier, more moisturizing bar of soap. People with dry skin or certain skin conditions, such as eczema, may find that soap formulated with milk can help relieve these conditions and leave their skin nourished.
Honey adds to the humectant qualities of the glycerin already in the soap, but it also acts as an antimicrobial agent on your skin. It will help keep your skin clean and beautiful. Plus, the sugar in the honey will make the soap even more bubbly!
BooBees Ambrosia soap is lightly scented with a warm, rich blend of oatmeal, milk, and honey. It smells amazing when you first take a whiff. Then, when you mix it with water and start sudsing up, you will find that it warms into an experience all its own. It will surround you with layers of bubbles, all bursting with the scent of true ambrosia.
To give them a little extra gorgeous factor and to remind you to feel your boobees regularly, I added a little pink on the top.
All BooBees products are formulated with goat's milk and honey to give your the richest, creamiest bar of soap possible. Goat's milk, like other milk, contains lactic acid which helps dissolve dead skin cells. It also contains a good amount of cream which is full of fats that help your skin look healthier because it provides extra moisture. In soap, goat's milk creates a creamier, more moisturizing bar of soap. People with dry skin or certain skin conditions, such as eczema, may find that soap formulated with milk can help relieve these conditions and leave their skin nourished.
![]() |
| In the mold. Oh, the anticipation! |
Honey adds to the humectant qualities of the glycerin already in the soap, but it also acts as an antimicrobial agent on your skin. It will help keep your skin clean and beautiful. Plus, the sugar in the honey will make the soap even more bubbly!
![]() |
| Out of the mold and cut! |
To give them a little extra gorgeous factor and to remind you to feel your boobees regularly, I added a little pink on the top.
Monday, June 4, 2012
Dead Sea Mud and Peaked Tops
The other day, I made some more of my Dead Sea Mud Soap. This time, I decided not to separate the salt and the mud into different layers, it was all going in the pot together. I also decided that I wanted to add a little lemon essential oil to the blend of peppermint, rosemary, and tea tree.
I chose to add sea salt to the mud bar because sea salt offers some of the same skin care benefits that Dead Sea mud does. It is detoxifying, exfoliating, and good for skin conditions such as eczema, psoriasis, and acne. I do not add Dead Sea salt, just regular sea salt because the extra mineral in the Dead Sea salt makes the soap "sweat." I originally chose peppermint, rosemary, and tea tree essential oils because they are all good for skin; they can help fight acne and dry skin! Plus, they smell so good together. I decided to add a little lemon because it also fights oily skin, but can also increase circulation and exfoliation. It can cause irritation, but I used it at a relatively small percentage.
I also decided to try my hand at "peaked tops" for soaps. I got the idea from a wonderful soap challenge at Great Cakes Soapworks, I didn't participate because of time constraints, but I loved reading! I watched several videos and read a couple of posts, so I just had to give it a try! I kept it fairly simple; I used a spoon to push the soap into peaks in the center and then I poked, prodded, and pushed until I was happy with it.
I unmolded and tried to cut the soaps today. I thought it was a little hard, but I didn't worry about it. As I started to cut, I noticed the first bar start to crack! DUH! Salt makes the bars a little more brittle, plus it was much harder than normal. So, I popped it in the oven to warm it all back up. They cut better, but the bottom edges did start to crumble a little. I don't think it will be a problem once they are cured and cleaned up though. I also decided that I won't do peaked tops until I get a wire cutter :)
These will be ready around June 29th. I usually let them cure a bit longer, but as hard as these already are, I think that will be long enough. Mark your calendars because these usually go fast!
I chose to add sea salt to the mud bar because sea salt offers some of the same skin care benefits that Dead Sea mud does. It is detoxifying, exfoliating, and good for skin conditions such as eczema, psoriasis, and acne. I do not add Dead Sea salt, just regular sea salt because the extra mineral in the Dead Sea salt makes the soap "sweat." I originally chose peppermint, rosemary, and tea tree essential oils because they are all good for skin; they can help fight acne and dry skin! Plus, they smell so good together. I decided to add a little lemon because it also fights oily skin, but can also increase circulation and exfoliation. It can cause irritation, but I used it at a relatively small percentage.
![]() |
| I looks so fun! The trick is a REALLY thick soap... |
I unmolded and tried to cut the soaps today. I thought it was a little hard, but I didn't worry about it. As I started to cut, I noticed the first bar start to crack! DUH! Salt makes the bars a little more brittle, plus it was much harder than normal. So, I popped it in the oven to warm it all back up. They cut better, but the bottom edges did start to crumble a little. I don't think it will be a problem once they are cured and cleaned up though. I also decided that I won't do peaked tops until I get a wire cutter :)
![]() |
| Not a great picture, but I did it with my phone. I love them! |
These will be ready around June 29th. I usually let them cure a bit longer, but as hard as these already are, I think that will be long enough. Mark your calendars because these usually go fast!
Subscribe to:
Posts (Atom)